What It Does
@kit/i18n provides shared config parsing, server instance creation, proxy header strategy, and UI helpers.
This feature is implemented through the @kit/i18n package and is the default localization path for web apps in this monorepo.
When To Use
- Adding multilingual support.
- Extending namespaces with feature modules.
Prerequisites
config/i18n.config.tswith resolver.- Proxy wired with
i18nProxy.
How To Use
i18n config
import { parseI18nConfig } from '@kit/i18n/config';
import { DEFAULT_LANG, SUPPORTED_LANGS } from '@kit/shared/config/defined-languages';
export const i18nConfig = parseI18nConfig({
defaultLanguage: DEFAULT_LANG,
languages: SUPPORTED_LANGS,
namespaces: ['dashboard', 'settings'],
resolver: async (language, namespace) => {
const data = await import(`../public/locales/${language}/${namespace}.json`);
return data as Record<string, string>;
},
});Server helper
import { createI18nServerInstance } from '@kit/i18n/www/server';
import { cache } from 'react';
import { i18nConfig } from '~/config/i18n.config';
export const getServerI18n = cache(() => createI18nServerInstance(i18nConfig));Proxy
import { i18nProxy } from '@kit/i18n/www/proxy';
export const proxy = (request, response) => i18nProxy(i18nConfig)(request, response);getServerI18n is the canonical server-side entrypoint for translated strings.
Package Translations
Monorepo package translations are integrated into the app i18n instance through cross-env filters.
Two common approaches exist:
| Approach | Pros | Cons |
|---|---|---|
| Separate i18n instance per package | Package is self-contained | Multiple i18n instances to initialize/sync |
| Shared app i18n instance (used here) | Single source of truth in app runtime | App must initialize package translation filters |
App-side integration
The app i18n config calls cross-env filters for:
cross_env_get_translationsto resolve package translation JSON files.cross_env_get_namespacesto append package namespaces.
import { applyCrossEnvAsyncFilter, applyCrossEnvFilter } from '@kit/utils/filters/cross-env'; import { initCrossEnvFilters } from '~/lib/init-cross-env-filters'; initCrossEnvFilters(); async function i18nResolver(language: string, namespace: string) { const packageTranslations = await applyCrossEnvAsyncFilter('cross_env_get_translations', null, { language, namespace, }); if (packageTranslations) return packageTranslations; const data = await import(`../public/locales/${language}/${namespace}.json`); return data as Record<string, string>; } const namespaces = applyCrossEnvFilter('cross_env_get_namespaces', ['dashboard', 'settings', 'onboarding']);
Package-side integration
Each package registers its own namespaces and translation resolver with cross-env filters.
import { enqueueCrossEnvFilter } from '@kit/utils/filters/cross-env';
import { I18N_AUTH_NAMESPACES } from '../../i18n/i18n.namespaces';
enqueueCrossEnvFilter('cross_env_get_translations', {
name: 'addAuthTranslations',
async: true,
fn: async (_, { language, namespace }) => {
if (I18N_AUTH_NAMESPACES.includes(namespace as 'p_auth')) {
const data = await import(`../../i18n/locales/${language}/${namespace}.json`);
return data as Record<string, string>;
}
return _;
},
});Typescript Support
i18next supports typed key inference through module augmentation in a .d.ts file.
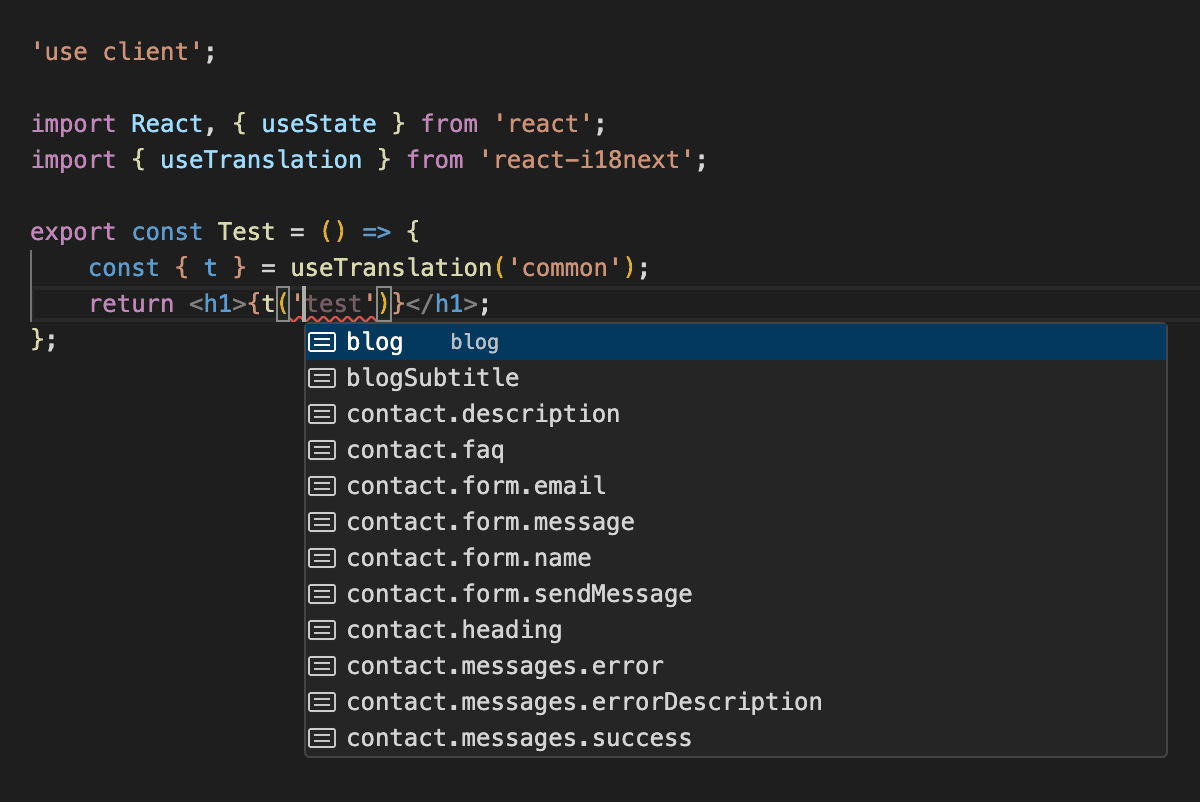
i18next typescript autocompletion
Recommended declaration layout:
.d.ts typing logic
The typing contract is:
- Import
i18nextto augment module types. - Import namespace JSON files from the default language (usually
en). - Set
defaultNS. - Map each namespace in
CustomTypeOptions.resources.
import 'i18next'; import { enAuth } from '../../../kit/auth/src/i18n/locales/en/p_auth.json'; import dashboard from '../public/locales/en/dashboard.json'; import settings from '../public/locales/en/settings.json'; declare module 'i18next' { interface CustomTypeOptions { defaultNS: 'dashboard'; resources: { p_auth: typeof enAuth; dashboard: typeof dashboard; settings: typeof settings; }; } }
When you add a new namespace, update both:
- i18n runtime config (
namespacesand resolver path). @types/i18next.d.ts(resourcesmap).
Make sure TypeScript loads the declaration
Use one of these patterns in app tsconfig.json:
- Set
typeRootsto include./@types. - Or include
**/*.d.ts/@types/**/*.d.tsthroughinclude.
Example (apps/dashboard/tsconfig.json):
{
"compilerOptions": {
"typeRoots": ["./node_modules/@types", "./@types"]
}
}Why default-language imports are enough
Type inference only needs one typed resource shape. Importing en JSON files gives key-level autocompletion and compile-time checking for all languages.
Filter API
Web package translations are resolved through cross-env filters so each package can self-register namespaces without app-local duplication.
| Filter | Parameters | Return | Registered By (package file) | Initialized In (app entrypoint) | Environment |
|---|---|---|---|---|---|
cross_env_get_translations | { language: string; namespace: string } | Record<string, string> | null | kit/auth/src/www/filters/cross-env-filters.ts, kit/organization/src/www/filters/cross-env-filters.ts, kit/billing/core/src/www/filters/cross-env-filters.ts, kit/keybindings/src/filters/cross-env-filters.ts, kit/ai/src/www/filters/cross-env-filters.ts | apps/dashboard/lib/init-cross-env-filters.ts | cross-env |
cross_env_get_namespaces | {} | string[] | kit/auth/src/www/filters/cross-env-filters.ts, kit/organization/src/www/filters/cross-env-filters.ts, kit/billing/core/src/www/filters/cross-env-filters.ts, kit/keybindings/src/filters/cross-env-filters.ts, kit/ai/src/www/filters/cross-env-filters.ts | apps/dashboard/lib/init-cross-env-filters.ts | cross-env |
- Call
initCrossEnvFilters()inapps/dashboard/config/i18n.config.tsbefore building resolver and namespaces. - Keep package registrations in
apps/dashboard/lib/init-cross-env-filters.ts.
MCP Context
capability: i18n_web_setup entrypoints: - apps/dashboard/config/i18n.config.ts - apps/dashboard/lib/init-cross-env-filters.ts - kit/auth/src/www/filters/cross-env-filters.ts - kit/organization/src/www/filters/cross-env-filters.ts - kit/billing/core/src/www/filters/cross-env-filters.ts - kit/keybindings/src/filters/cross-env-filters.ts - kit/ai/src/www/filters/cross-env-filters.ts - kit/*/src/www/filters/cross-env-filters.ts - apps/*/@types/i18next.d.ts - apps/dashboard/lib/i18n.server.ts - @kit/i18n/www/proxy inputs: - languages - namespaces - resolver_function outputs: - translated_ui_strings constraints: - resolver must return namespace dictionary per language side_effects: - sets i18n header in proxy response
Agent Recipe
- Configure languages/namespaces and resolver.
- Initialize cross-env filters for package namespaces.
- Wire proxy and server i18n helper.
- Maintain
@types/i18next.d.tsresources mapping when namespaces change.
Troubleshooting
- Missing keys: check namespace registration and locale files.
- Wrong language server-side: verify proxy header logic.
- No i18next key autocompletion: verify
@types/i18next.d.tsis loaded bytsconfigand namespace exists inresources.
Related
Error and request monitoring with @kit/monitoring and Sentry.
Practical translation usage for server and client code.
How is this guide?
Last updated on 3/27/2026